
Aperture setting – another cornerstone of the exposure triangle. Master aperture settings and you will learn how to control depth of field and the area of the sensor exposed to light.
As a refresher on the Exposure Triangle –
Aperture: controls the area over which light can enter your camera
Shutter speed: controls the duration of the exposure
ISO: controls the sensitivity of your camera’s sensor to a given amount of light
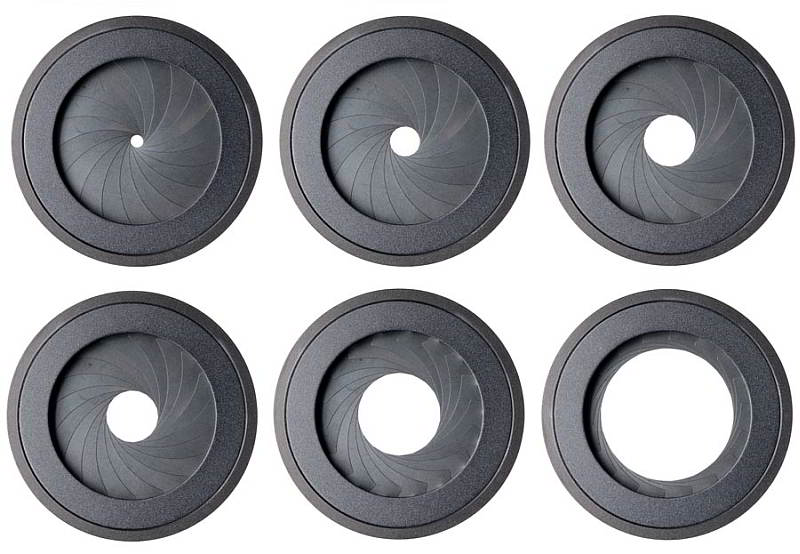
What Is The Aperture?
Basically speaking, the aperture is an adjustable hole in the lens, through which light travels into the camera body. The mechanism of the aperture can be related back to the pupil of the human eye. The pupil opens (gets larger), or shrinks (gets smaller) to control the amount of light entering the eye.
A camera’s aperture setting controls the size of the opening of the aperture, and thus, the area over which light can pass through the camera lens. It is specified in terms of an f-stop value. This unit can be a little confusing, because the area of the opening INCREASES as the f-stop DECREASES.
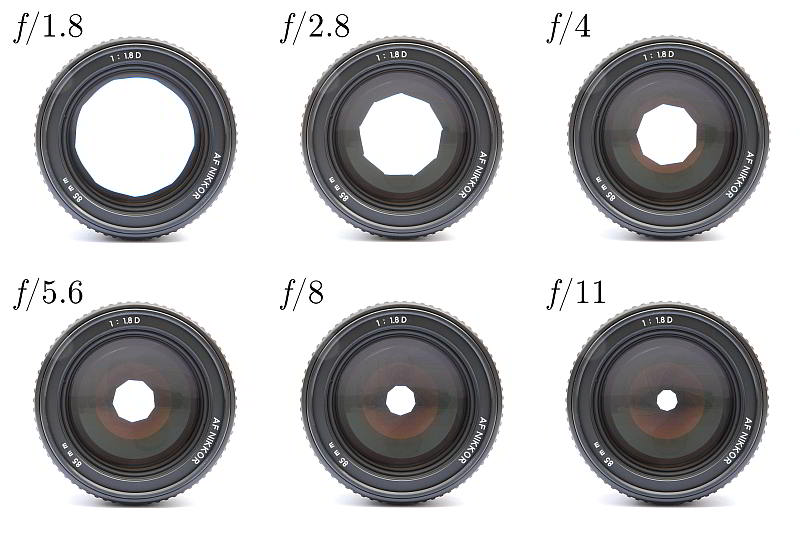
The standard f-stop settings are as follows:
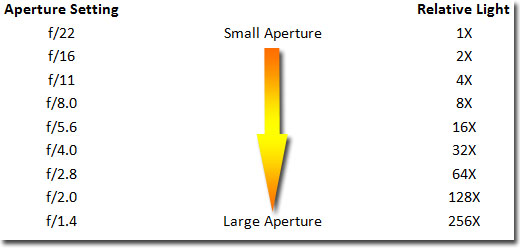
These are standard aperture settings that most lenses will offer. Most lenses will also allow finer adjustments with half or one third steps.
Aperture Setting Limits
Every lens has a maximum and minimum limit on the aperture size. You should be able to identify the maximum (lowest f-number) and minimum apertures (highest f-number) of your lens by viewing the lens specifications. The maximum aperture of the lens is much more important than the minimum. The reason for this is the maximum aperture of a lens is also an indication of the speed of a lens. A fast lens would have a maximum aperture of f/1.2 or f/1.4 . This means it can pass through more light than, for example, a lens with a maximum aperture of f/4.0. This shows that lenses with large apertures are the better choice for low light photography.

Effects of Aperture Adjustment
The most common effect that can be achieved by aperture adjustment is that of depth of field.
Shallow depth of field is when the main object is in focus, and the background is blurred or out of focus. Changing the aperture to a wider aperture will make the background become more in focus, or sharper. You can look at this as the smaller the aperture, the smaller the focal area, the larger the aperture, the wider the focal area. This is best illustrated with the examples below.
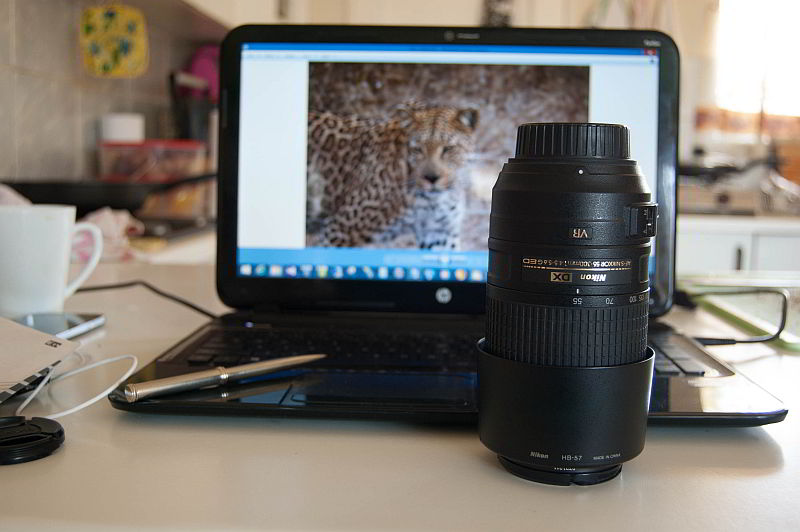
Aperture Setting f4.0

With Aperture at f7.1
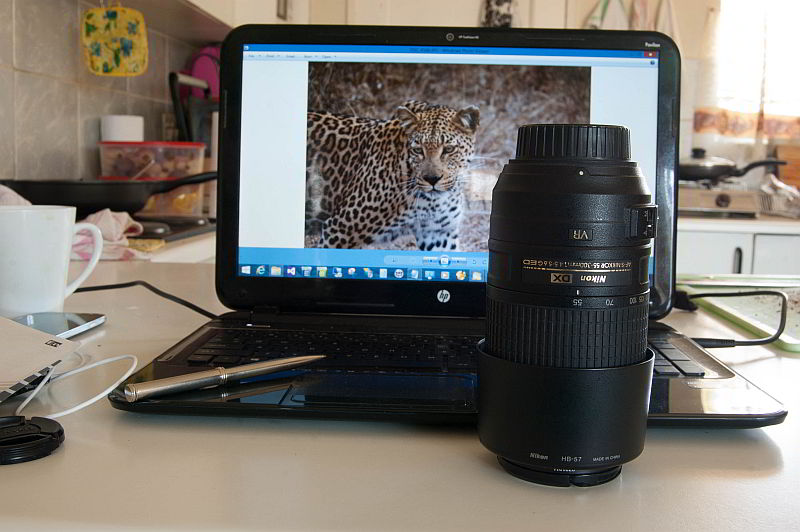
Aperture f11.0
As you can see from these images (click on the images to see larger versions) – from top to bottom.
- With the aperture setting at f4.0 – the lens is in focus, the image of the leopard on the screen is out of focus or blurred. This is sometimes referred to as “softening” the background.
- Aperture f7.1 – the lens is in focus and the background image of the leopard is slightly more focused than the first image.
- Aperture f11.0 – the lens is in focus, and the background image of the leopard is sharper and also in focus.
Summary
Aperture can be used to blur or soften the background to make the subject stand out. alternatively, it can be used to give the background more clarity or sharpness if that is the desired effect for the shot.
Changing aperture would also usually require change in shutter speed, depending on the available light, to achieve the correct exposure for the shot. Try shooting in ‘aperture priority’ mode initially. The camera will adjust the shutter speed automatically for you while you learn. You can then progress onto full manual mode where you control both aperture and shutter speed.
As you practice these skills, remember the words of author Napoleon Hill – “Patience, persistence and perspiration make an unbeatable combination for success.“


